Pages

Showing posts with label Plastics. Show all posts

Tuesday, 29 September 2020

Gobbortunity Knocks - Orcses

So as a little distraction from the more serious stuff, some of the folk on one of the forums I'm a member of, thought it would be fun to run a goblin Week. So the challenge was to paint up a unit of Goblins/Orcs - the starting gun was 28 September. 

I had some of the Kings of War Orcs plastics, assembled and undercoated by Sunday night, and managed to whizz through them over the last two days. 

So here they are in all their gory.


Friday, 29 December 2017

PSC 15mm T55 - Quick Review and Painting

Some time back, I saw that Plastic Soldier Company were advertising pre release pricing on company boxes of 15mm Cold War Soviet infantry.

I already have a Danish Cold War (c 1985) force, which is largely outclassed by most modern forces of the period, so I thought it would be a great opportunity to put together a cheap opposition force, representing a second line Soviet battlegroup, so that the poor Danish Centurions and M41 were not outclassed completely by Soviet T64 and WarPac T72. The plastic PSC T55 would be ideal.

Just a day before Christmas, a package came through the door containing the PSC Soviet Infantry and the PSC T55 plastic models. Excellent!


As is the case with all the PSC products I have purchased in the past, there is a simple instruction sheet, showing assembly in the form of an exploded diagram, and on the reverse, a colour coded sprue diagram which is matched to the various options to assemble the basic early Soviet model T55, the T55a, Polish, East German and Czech variations, and the modernised T55AM2.

I am no huge expert on Soviet hardware, but I would check carefully against published images to make sure you are selecting the appropriate turret hatches and snorkel arrangement. I found the colour coding to be unclear in a couple of places, and the colour variation not sufficient for me to be able to definitively decide whether I was looking at a pink or lilac component, or differentiate properly between a dark yellow and a palled orange.

If I was colour blind, I would have struggled to differentiate between parts. Bit of a black mark for PSC. The colour thing is a neat idea, but numbering them as a backup would make it more user friendly.

There were other downsides to the kit, that were unusual for PSC. I found it difficult to get the very nicely detailed one piece track assemblies to lock into place without strong clamps, as the peg and slot don't have a great fit, and this becomes a big issue if you are building the AM2 model, as the side skirts have a groove designed to allow the tracks to sit in. If the running gear isn't properly aligned, you will be in for a lot of cursing trying to get the skirts to sit in place.

Secondly, it wasn't easy to determine from the instructions, exactly where the left hand turret box and the smoke dischargers were supposed to sit. Again, photographs recommended. 

Finally, the hull top to bottom hull alignment is one to take care with, it is a butt join along the edges and while the rear sits into a recessed section, the front is free floating, and it's not hard to get it out of a straight alignment as there are no teeth or pegs to lock it in place.

Alright..  minor nuisances dealt with, I was delighted with the results. I built 4 out of the 5 as the AM versions, leaving one as a much older Soviet T55 so I had it for possible African conflicts.

Painting was a black undercoat beneath, a grey one on top, using my standard spray enamel cans from the local hardware place. Following that I pulled out the cheap airbrush, and gave a light undercoat of a much lightened Vallejo ModelAir Olive Green. Adding more white, I went back over three times to give some light and shade (modulation).


The effect is subtle, but otherwise - washes and highlighting would do a similar job. It was then a case of adding base colours for tyres, tracks and machine gun, and giving the gun a quick wash with GW Nuln Oil. Once that was done, I grabbed some old Battlefront decals and some Decal softener, keeping it very simple. I thought about extensive weathering, but these would be basically new vehicles, recently refurbished to AM standards, and it's the first days of a war, so not much time to get everything worn and rusty.

A spray of gloss varnish to seal everything, added lamps and headlights in dark blue, with Bavarian blue and white highlights, matt varnish to get a sort of 'Satin' finish, and dabbed some gloss varnish on the lenses.

Overall you could build these 5 from start to finish in a day no problem. So the finished product, good enough for wargames I reckon!


Wednesday, 13 December 2017

Doings, mainly in the Desert

Over the last little while I have accumulated a few bits and pieces to go with existing armies. I also finally bit the bullet a while back, and did what I have been tempted to do for ages, purchase the Perry Miniatures plastic Desert Rats and Afrika Korps 28mm minis. Of course, a bunch of other stuff was then required.

Perry's assembled
Ok, so phase 1 was assembly, phase 2, glue them all onto 2p pieces, and add sand/rocks. Then undercoat black. At this stage I have just hit them with the airbrush for a basecoat, then gone back and added a highlight from the top with the airbush.

Incidentally, I have been having real issues with the airbrush spattering, clogging etc. To the point where it was a real pain to use. I disassembled it again, and then decided to visually check and use the nozzle and tip marked 0.5mm with the 0.3mm needle.

Hey presto.. it worked perfectly. It seems like some plonker at the 'Happy Airbrush Assembly Plant no 9' had mislabeled the components, and I was using a non-matched needle and nozzle.   I am a much happier air-brusher now.  Next step, will assembly line paint the base flesh tone on these guys.

Supreme Littleness designs desert buildings with a coating of Evostik grout.
The other stuff?

A shout for Michael at Supreme Littleness designs. I worked the Bring & Buy at Kirriemuir, and sold quite a few of his pieces. I also picked up some for myself, and added the single storey one via post. Lovely stuff. These have progressed a bit from this pic, and now only need detail picked out, and some tufts added.

One careful owner
So I have a few vehicles now, but was missing the iconic kubelwagen. As usual I put in a couple of ebay bids. This was th eresult. An immaculate 'Victoria' model, and a clapped out Schuco one, which I attacked with a hacksaw, milliput, and paint. Guess which is my favourite? These are a bit overscale for the Perrys, but it won't be terribly noticeable unless someone puts an actual 1/56 model down beside them.

Say it with markers
The Patrol phase means markers, so a few new sets, also from Supreme Littleness. Unfortunately, I went mad with varnish, and ended up with an interesting finish.. ah well..  I call it a patina.

1/100 Tanks
The nephew was showing off some Zvezda kit, so I threw these together for amusement. I rather like them. I must look out for their Panther. I will NOT do WW2 in 15mm.. I will not..

The getting it together box
I also decided I needed to try and finish up a few things before New Year, and there have been various vehicles hanging round for a while. I also took advantage of some sales to add a Crusader and R75 Motorcycle combo (Rubicon), Churchill & Stuart (Italeri), a diecast Sdkfz 231 8 rad AC, the Warbases Rolls Royce Armoured Car, and a Blitzkrieg Miniatures PzIII in resin/metal. It's a nice kit, but I am still not sure about resin.

Most of the rest of these just need some detail painting and weathering to call done. So there is a good chance of knocking these off very quickly.

And I am still waiting for the palm tress from China..   oasis needs some dates...

Friday, 18 September 2015

I blame John...

Also resold by Italeri
So when John came over to play some Signal Close Action last night, I showed him some of the USMC stuff I have been doing, and he posed the question: "Do you have an OpFor?"  errrr...  well... no.

This led to looking up websites, checking plastic figure availability (amazingly limited for Cold War period Warsaw Pact)..  and identifying that the ESCI Russian Special Forces (Spetsnaz) were really the only decent option.

Unless you went for the Orion 'Chechnya' period figures - which you would need a couple of boxes of, and look to have some very weird poses. (Including a man urinating? what the?)


Some bizarre figure choices ruin otherwise a good set.

So this morning, I idly looked up the online pricing for a suitable Spetsnaz force..   

S-Model do the airborne BMD fighting vehicle…  2 models for $16 + postage.. same seller has the ESCI figures for $11.95..   plus a T64 from Modelcollect.. 


Pricier at $23, but shipped free.. 
and you can’t do without the iconic Mi24 Hind attack helicopter…    $18 inc postage on ebay for the excellent Zvezda kit from a seller in Lithuania..  


Aaarrrrgggghhhhh… too shiny. I have no willpower. Thanks John.


My pocket is lighter, but I will have a matched opponent…  now all I have to do is postulate an American Marine landing somewhere desert’y in 1980 opposed by airborne Spetsnaz forces..   the T64 will have to be a blow in…    
 
Maybe the Spetsnaz have been sent to support the Socialist Yemen regime, with the T64 offloaded at port..   the Saudis ask for help, and a Marine MAU is sent to help..  ok.. there’s a scenario.

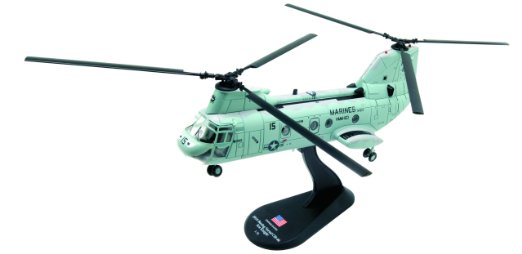
And this morning the postie brought me another LVTP7 (the dragon model from Hobbyco in Oz, a special at  $6.95) plus a diecast CH46 transport helicopter all the way from Poland. USMC Transport won’t be an issue…

Tuesday, 8 September 2015

US Marines 1980

A casual comment by a friend that they were doing some Cold War stuff in 20mm caught my attention. Jason is using Bolt Action, but there is also the Too Fat Lardies Chain of Command (CoC) - now on special at 20% off for the WWII version, and the possible release of the Lardies 'IABNM' (I ain't been Nuked Mum').

Well, I already had some bits and pieces, and 20mm is dirt cheap. So looking at what I had, and what was out there, I figured I could do a quick and dirty USMC platoon plus supports. I don't much like the 'Super-Tanks' - and for someone of my vintage, Cold War is always going to be say 1979 - 1984. Add to that the super-cool MERDC camouflage, and it was an easy choice. I had toyed with the idea of BAOR (British Army of the Rhine), but someone else locally was already collecting that. Marine Amphibious Unit 32 used M60, LVTP7, Dragon ATGW, Cobra attack choppers and Sea Knight Helicopters, plus various support options such as 106mm Recoilless Rifles.

First up, a 1/72 M60A1 tank.. this was a MARS (Galaxy) kit, supposedly of a M60A1 with reactive armour, but I already knew from the review on 'OnTheWay' models, that it didn't have the reactive armour.

Note the amount of green stuff. Not an easy kit to build. The tracks are too long and melt with superglue, none of the turret rails or attachments actually fit into the cast 'depressions' (not holes). But it does have the look of the thing.

 Quick squirt of the PSC 'British Green' for an undercoat.

Get busy with the airbrush, I used the Citadel Base Colour XV-88 for the tan, Citadel 'Zandri Dust' for the sand, and Citadel 'Eshin Grey' for the 'black'. Plenty more work (chipping, weathering, added gear), but a good start.

For the Marines themselves, I grabbed a box of the excellent, ESCI 'Modern US Soldiers' - 'Modern in this context circa 1980'ish. Lovely casts, practical poses for wargaming, and 50 figures in the box gave me enough for 3 x 13 man squads, a command group, spare torsos for the M60A1, plus additional ATGW teams with the Dragon missile.

'Hey man, you think command has figured out where we're going yet?'
One of the appeals is that the Marines can use the unusual LVTP7 amphibian, readily available cheap as a pre-made model. This one clearly needs a repaint! - In the background is a Blackhawk, just being introduced at this time. This one is another pre-build, from a magazine, and in Desert colours. Some more repainting required. Ideally, it would be a CH46, but those are either hideously expensive or impossible to obtain. Obviously this UH60 is brand new, and being trialled.. ;-)


And as every bloke knows, you end up with a heap of change over time, so I raided my coin bucket. I like to base my plastic troops, to give them a bit more stability, and also so the figure itself doesn't get so much handling. A decent undercoat and acrylics really helps prevent the old flaking paint problem, but every little helps. I could have bought bases, but Australian 5 cent pieces are an ideal size, and work out way cheaper than washers or custom cut bases.


So - PVA on the coins - later they will get a PVA and sand coating to really make them solid. You might note that the windows of the Blackhawk have gone white. I thought about this for a while, as the pre-build has clear plastic window pieces, and I could have just oversprayed, then painted them in blue, but I am trying an experiment. I have painted over the clear plastic with PVA. Once this has dried, I will do the repaint, then try and peel off the PVA. I haven't tried this before, but I have read about it.

And yes..  success..  the windows peeled off easily, and the 'mask' worked perfectly.

Sweet Rides!


And the grunts got their bases coated with PVA + sand, next step, a dry brush with a pale olive green.


I have a Huey Cobra attack helicopter and two more LVTP7 on the way (pre-builds), cost, next to nothing, and I reckon this will be a cool little unit. Not sure about game effectiveness, but these are big squads, loads of firepower, and they're Marines...  'Ooo-Rah!'

Tuesday, 30 September 2014

Back on my Med (ieval) s

Well, apologies for the bad pun. Been assembling more of the excellent Perry figures. Even splashed a bit of paint around. One thing is obvious though, while I can make the rest work, my 15mm techniques for painting flesh are not going to work.

The colours will eventually be those for Douglas


Monday, 7 July 2014

The Tank Factory Goes BIG!

So I decided to go from the sublime to the ridiculous, or perhaps in reverse, from the ridiculous (Italian L3/33 Tankette) to the impressive - German King Tiger, or Pzkfpw VI, Ausf B, (with 'Henschel' turret).

This is a Revell kit I have had in my stash for a while, 'OntheWay' website rates it as "One of the very best kits on the market today. Absolutely outstanding kit." 

I have been sort of skirting around it for a while. Firstly; because I don't want to be one of those bizarre 'fanboi' nuts who can tell you what some SS Panzer Ace had for breakfast the day he was killed, or have score tables memorised, and secondly, because I wanted to make a good job of the kit, so the smaller and easier vehicles were a good intro. Anyway, I finally 'screwed my courage to the sticking post'. 


 Handsome looking beast eh? I am going to try a variation on this paint, but very much lighter 'yellow' - the crews themselves applied camo over the factory base colour. It looks like the base colour got bleached quite rapidly, and you should always use a slightly lighter colour for smaller scale models.
Arrrghhh..  the enemy... 6 sprues of handsomely moulded tan plastic, one tiny tiny piece of mould flash to be cleaned off, otherwise perfect. Note the 101 track pieces bottom centre...

And here's all these wheels..   lots of cleaning of sprue attachment points. It's easy to get overenthusiastic and accidentally give them a flat rim. If you do, mark it in pencil and allocate to an axle where the top of the wheel is largely masked by the skirts.

As a reward for cleaning and assembling all the drive-train components (you can see the first set already attached to the lower hull side pieces on the left of the Pic), I allowed myself the luxury of starting on the Turret. Much more fun.

As you can see, the major assemblies are done. I had already dry-fitted (no-glue) the major hull parts together and was happy there would be no problems in getting them assembled correctly. Not attaching the lower hull and drive train to main hull made it much easier to assemble the tracks.

Complete other than tracks. The hanging tracks on the side of the turret were tricky to find good attachment points for. I am surprised that Revell didn't provide 'hangers' for the turret sides to attach them to. They would have been tiny, but not much smaller than some other components.


The Tracks are on! A very fiddly job, with the carpet monster swallowing one whole link. (I only found it today) - As you may notice, I have removed a couple of sections of the schurzen or side-skirts to simulate a bit of wear, so I fabricated a fake track link from one of the removed schurzen and hopefully the substitution wont be too noticeable. I also considered taking one of the turret link-sets and cannibalising that, but as they are cast as doubles it would be very fiddly, and I would have to fabricate hangers for the blank spot.

MEMO - Revell - please please please include a couple of spare track links in future link and length track sprues. It is horrible to think you might have a model ruined simply because you lost or damaged one single tiny component.

Glamour shot. This morning I decided the one noticeable thing missing was the electric cable between the front headlight and the junction box on the deck. I added it with 8A Fusewire, after drilling appropriate holes. 

I am rather pleased with the Biggest Cat - it's in the paintshop at the moment, getting the traditional car primer grey undercoat...   pics to follow when I feel brave enough to get the airbrush and paint brushes out.

On the whole, a great kit. As I noted above, a couple of omissions, the light cable, plus the hangers for the turret links. 

Friday, 2 May 2014

Dragon Armour JagdPanther 1/72

So I had a trawl through various shops the other day - picked up bits and pieces - including the Airfix Quad tractor for my Esci 25Lb gun. Then went back to work, to discover the Dragon Early Jagdpanther kit was tucked away in my office.

What a beautiful kit.. 

The Esci stuff is nice, the old Airfix stuff can just about be made to work..  but the Dragon kist was lovely. Everything just fits. The detail is lovely, brass photo-etched (PE) bits, wire for cables, and I bored out a hatch and added a PSC command figure.

Here's where it is up to...  engine deck held up (maybe it's overheating) as it would be a shame to lose that detail, floorbrush bristle for the engine hatch stay, hacked around Schurzen, PE in place  - and it is a beautiful thing. I need to do it justice with painting. I was tempted to try the hairspray/salt technique, but as it has kit moulded Zimmerit, it probably wouldn't be the best kit to do it on. I still have a spare PSC Pz III, so I may try it on that. Here's how it looks so far.


Friday, 25 April 2014

Some Advice

So I was fortunate enough to pick up some more 1/72 kits from a friend the other day.


Now tucked away in there is a box marked 'Science Treasury' - Light Tank Stuart Mk 1.  "Goodie!" thought I - I wanted a Stuart as they are a very cool little tank, and not so overpowered.

If you have one of these kits in a model stash, you have two good choices...   first make sure your craft knife is very sharp, it will hurt less when you slash your wrists. The other choice is simply to drop it straight into the nearest bin.

It's a remould of the old Hasegawa kit, complete with a man on a horse. The only small problem is that Hasegawa moulding standards were usually very high. 'Science Treasury' - well theres aren't, and they also seem to have widened the channels on the sprue, and misaligned the moulds. There is so much flash, so many blocked holes, warping, ejector pin marks, and bits that seem to just have holes where they shouldn't, that the kit has become a nightmare. Nothing quite lines up, and the work to get the mould lines and marks corrected is just horrible.

Bits of a Stuart on the left, Dodge light truck on the right (ESCI)

Here's the culprit - a whole morning to get it to this stage - (compared to the Dodge Truck - which was done in 90 minutes last night after coming home from a really fun night doing a re-fight of Clontarf for the 1000 year anniversary using DBMM).

Next struggle will be the rubber band tracks, and getting those over the road-wheels and onto the miscast sprockets which took about 25 minutes each to clean up...   maybe it's time to check the craft knife is still really sharp.

Monday, 6 January 2014

Just a Quickie.. Daimler II - Hasegawa

So, since the new kits arrived today, chucked one together. This is sure no 'fast-build', 48 parts, some of which are very tiny indeed. But the moulds are brilliant, everything fits together with beautiful precision, and the model itself is very pretty. Hasegawa also do the Humber Armoured car, but this one is a bit more unusual.

So here it is in all its glory...  ready for a cleanup, some stowage, and an undercoat tomorrow.


Belated Santa arrives

So.. back to work after the Christmas break, and firstly, I check the letterbox, and there is 'Slingshot' from the Society of Ancients.. great. The mail-room delivers, and my desk starts filling up...


The desk...  getting full...  Slingshot, obvious, and what's that other stuff?


Here's a wonderful Christmas Bonus. The Eureka Miniatures newsletter had a quiz question.. about David Bowie, and four films he had played a military man in..   and I won!   The prize, a sample figure of each code in their new 28mm Army of Saladin range. Lovely stuff. If you look closely, you can see they even provide a nice piece of brass wire to support the parasol to shade the great man!


Next up..  Early War Miniatures specials on a range of artillery for 20mm, so I picked up a two-pack of their 75mm German PaK 40, and I took the chance to add in a whole bunch of packs of their stowage items. These will be added to the various vehicles I have acquired for Chain of Command...


Finally - Hobby Search Japan..  and three excellent Hasegawa plastic kits. I peeked inside and these are really nice moulds, with crew figures, and lovely flash-free light grey plastic.

All in all..   happiness..  and as they were ordered in December.. the Lead Pledge is intact!

Wednesday, 4 December 2013

Bert & Ernie (Or maybe it's Ernst)

For those who have been paying attention, I got back into kit-building with the Esci Churchill, and the Airfix Panther.

So here's some glamour shots...  Bert...


And Ernie - with his little Pal..   1/72 Airfix Panther vs 1/285 GHQ M3 Half track.


Guess which one is a more accurate model, has more detail, and requires less assembly ? Compared to the Esci kit, this is a woefully primitive model. But an hour or so with some modelling putty, zimmerit and stowage, some time in the paint shop.. a couple of figures maybe..   and it should look alright on a wargames table.

And the Caesar US and German sets arrived from Taiwan today...   really great service. All excited now, and all I have to do is sort out what bases I want to use.