Pages

Friday 27 September 2013

Air Support - BKCII - NW Europe

So it is probably a result of too many re-runs of 'A Bridge Too Far', but I just can't visualise a British Late War force without serious air support..   and to me, that means rocket-carrying Typhoons in a taxi rank, just waiting for Joe Vandeleur to whistle them up... 

Ok, so it's 11th Armoured, and it is more likely to be Brigadier Harvey of 29th Armoured Brigade, but you get the picture. So here's the 11th's RAF chums. Just ready to take out that concealed AT gun.

Models are Raiden, but interestingly, their catalogue says 'Tempest' - and the pictures are labelled 'Typhoon'. I'm not fussy...  in 1/285, close enough for me. I did invasion stripes, as I just think they look cool.

Raiden Tempest/Typhoon.
I really like these models, they are unfussy, don't need assembly, and for me, capture the 'look' of the aircraft I remember from Commando comics. Looking at the closeups, I can see the fuselage invasion stripes are not quite right, but I am not sure if I can correct it now.

Thursday 26 September 2013

BKCII - NWE - Stage 3

And now, pretty much just decals (ordered) and divisional symbols to add...

Infantry Advance
Infantry HQ Units
Armour HQ
3" Mortar Unit
The PBI

Wednesday 25 September 2013

BKCII - NWE - Stage 2

Stage 2.. some basing...
The whole Battlegroup
Shermans in the mud..  Infantry still need a lot of work
Recce, FAO and FAC
Divisional CO
CO & Supports

Left, Infantry HQ, Right Armour HQ

Sexton & Cromwell - 3" mortar units in the background.
Next thing is to add some crew, paint up the infantry figures, dab some divisional insignia, (red square on the left, yellow rectangle with squiggle on the right for 11th Armoured, and wait for the GHQ decals to arrive. Starting to get verry pleased with how these are now looking.

Tuesday 24 September 2013

BKCII - NWE - First stage done.

So an evening's painting, and I now have the basic colours and basing done.

Now to do some experimental infantry paints, some camo..   and see how they look. I am very happy with the depth in the colour on the grey undercoat, I took a closeup of a Centaur on the Command base -

Mud, mud glorious mud! - next some flock etc.. 

Close up of the command base, I like the depth of colour.

BKCII - NW Europe - Painting time


You know how the casual conversation goes.. down the club, Dave mentions North West Europe, as there are a range of scenarios available on the Fire and Fury website..   one thing leads to another, and I recklessly say that I could probably get the Commonwealth forces from the shed ready for action pretty quick..  GHQ Shermans, Cromwells, Sextons, and various armoured cars and universal carriers. I am still short a whole lot of M3, but I will worry about that later.

I had always intended them as 11 Armoured Division, but for Operation Garden, it's all Guards Armoured. I reckon do them as 11th, and then turn a blind eye to the yellow bull.

I thought I would try something slightly different for this next lot of BKC warriors to see paint. So I decided I would try and work with some thinned paint over a grey undercoat.

Rummaging through the paints pile I found a large tub of artist's Matisse Olive Green Deep. First step..   glue the Shermans down, use some of the Gale Force 9 scenic 'grit' and spray primer grey..   cheap car primer.

So here's how the progress is to date.
Undercoat (some of the Shermans are already green)

Sample Humber with the Matisse Green applied thinly.
 Early days, but I am quite pleased with the effect so far.

Friday 20 September 2013

Battleaxe Report - BKCII Battle

So after last times 1943 Tunisia battle, we went back to the earlier period. My Commonwealth forces were a scaled down version of the Forces used in Operation Battleaxe, June 1941.

Dave brought along a force including motorcycle battalions, Italian tanks and infantry, so basically neither of us brought super-troops..  although in period, the three Matilda II I fielded were pretty powerful.

The British arrive. 7th Support Group in the centre, 4 Armoured Bgde left, 7th Armoured haven't arrived

Early days for the British weren't promising, a series of low rolls, then a couple of command blunders, and one arnoured brigade (7th) didn't show up for the first three turns.depite trying to use the CO (Major-General O'Creagh) 'do-over' roll. (In BKC, the same as Cold War Commander and Future War Commander, each HQ or Command unit is assigned a Command Value, this is the number that must be rolled at or under on two six-sided dice to successfully issue an order. Penalties apply for issuing orders to other formations, or troops too far away or in some cases, issuing diffenet instructions to the units under command. The CO has a 'do-over' roll  - so I tried to use it to bring on the 7th Armoured, but failed several times. Brigadier Hugh Russell would be getting a 'rocket' at the debrief.)

A steady advance
Finally, 7th Armoured arrived. I didn't want to rush too far forward before they arrived, and I didn't want a possible Axis artillery barrage to hit my softskins while they were all bunched up. In game terms, the 7th Support Group is too big to do two critical things..  disperse far enough to not present an ideal artillery target, but not so far that you are suffering command penalties for parts of the group. It makes it slow to push forward, unless you focus on only moving bits of it.


7th Armoured arrive in the top of the pic.

Recce pushes up, on the far side, 4th Armoured is now facing off the Italian Armour

The Forward Artillery Observer seems to have parked his Unversal Carrier on top of the mosque on the hill in the centre..  a handy spot.

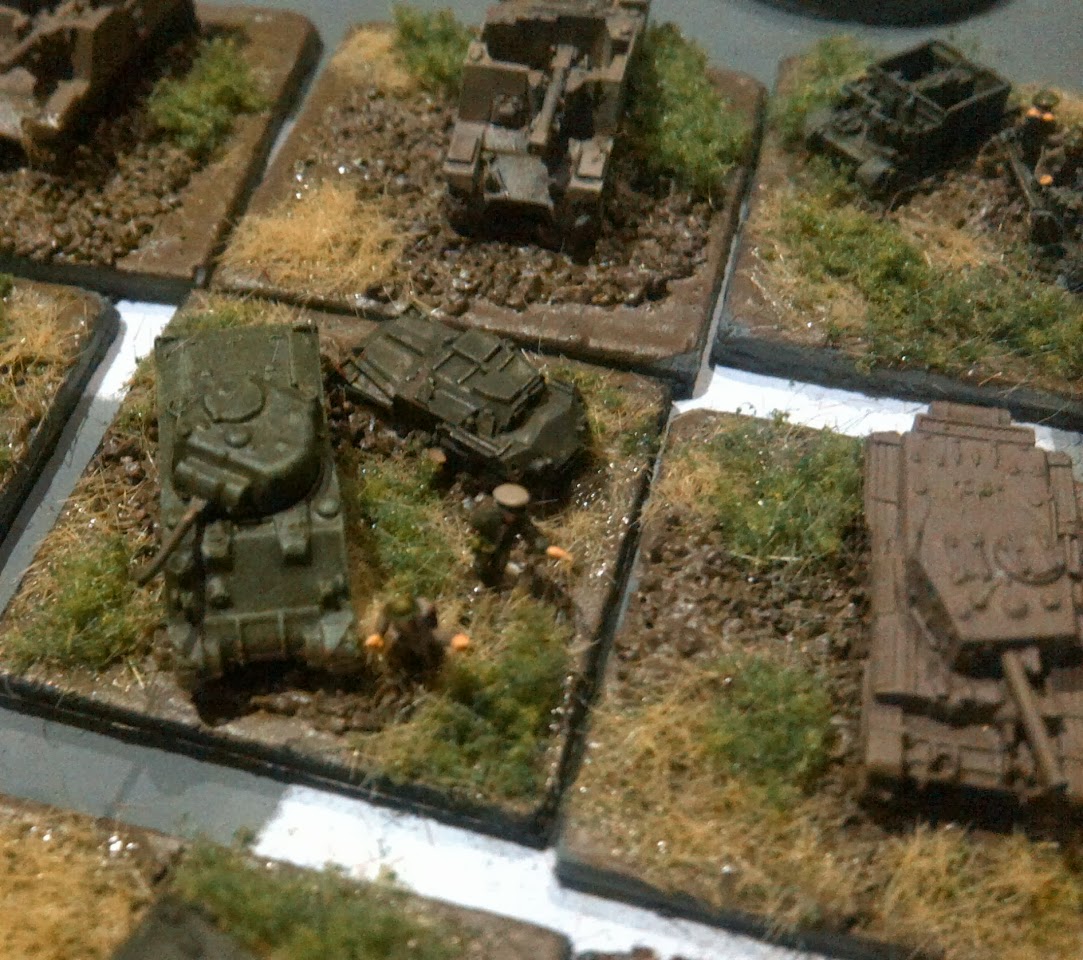
A9 & Crusader I on my left.

In the background of this shot are three Royal Artillery batteries (one model per battery) and I included 2 Forward Artillery Observers in my force. Each of the 25lb batteries fires with an effect of 3 dice per battery, and with the observer higher than the target, plus the famed British Artillery accuracy, essentially this means, if you can make the command roll for one fo the FAO, you can call down a storm of fire - attacking any element in the target area (20cm diameter for a 'concentration') with 9 dice.

Against softskins and infantry i the open this can be devastating  - and even against armour, there is a reasonable chance to 'suppress' them so they can neither move nor fire. I managed three successful 'shoots' in the game, and each one was very effective. I was grateful that Dave had not brought any artillery himself. 

German tanks push up past the AT Guns
The first German tanks started an advance but were hit by 'Opportunity Fire' by the opposing 7th Armoured and smashed up before they could have an impact.

Red dice show hits and 'suppressed'

7th Armoured then pushed forward, and with the support of an artillery barrage, plus mortar attacks on the German Anti-Tank guns, started an exchange of fire with the DAK PzIII and PzIV on the hill. With the artillery and mortars suppressing many of the German units, and despite losing all the (exceptionally fragile) A9 Cruiser tanks, the Brits were winning this exchange. The Germans had no answer to long range artillery and mortars, and advancing into the stationary fire of massed British Crusaders supported by 2lb portee units was not the answer.

Starting to look parlous.
On the other side of the table, the Italians had little answer to the heavily armoured Matilda II tanks, they destroyed a Vickers light tank, over-ran and forced back an FAO, but were then unable to make any impact and lost several of their number.  


At this stage we called it a night. Cracking game from my side, and only really one reference to the rules required (can multiple FAO attempt to call fire from a sngle battery?)


Friday 13 September 2013

Operation Battleaxe - Caunter in 6mm Part 2

So a little more work, and the last stages are just to do some markings. I need to find some decent sources for this. Then finish the bases.

A9 on the left, command stand on the right
A triumph of British engineering, the Vickers VIb

Close up of command stand

Thursday 12 September 2013

Shipwreck - First Outing - Updated

So Peter and I, (after many false starts), finally got to have a first go at 'Shipwreck' from Vandering publishing, a set of Modern Naval Rules. I had painted up a Soviet era fleet from Navwar, with helicopters from TSS Seawulf, and for our first run, we kept it simple, I took two Udaloy I and a couple of Sovremenny class. Peter had French - two stealth destroyers and a couple of supporting frigates. So the rules we needed were basically manoeuvre, detection, helicopters, missiles and the core combat rules.

Soviet Ka27 spot the French - and in return are detected.
French Missile Launch
[Edit]
NB - the apparent French launch had to be aborted as he realised the Exocets were out of range.  Lots of markers are very handy, - (active radar, detected, missile, etc) as is a careful study of the turn sequence. We used Litko, and I am going to order some more, as I noticed we were running short.

The rules are a bit scattered and not always consistent. So for example, under the detection rules it basically states that unless otherwise specified all modern stuff has Data Link as a capability allowing detection and reaction (missile launch etc.) in the same Manoeuvre turn. But in the appendix for helicopters - it only has one chopper listed as having Data Link.

The Soviets make a missile launch - SS-N-22 and SS-N-14 - French in the distance.
 [Edit]
At this point we realised that the SS-N-14 were also actually out of range.. the markers (Litko) went back in the bag, and the 22's headed off at sea level..

Soviet SS-N-22 about to impact
[Edit]
As the Soviet Fleet Commander, at this stage I had detected and targeted all the French vessels and he had only detected two of mine. Lessons learned - get your helicopters in the air, get them in the air ealry, and get as many of them in the air as you can. I forgot a couple of my ships had more than one helicopter. (I also couldn't find any rules to allow my helicopters to drop torpedos ;-)

16 SS-N-22 came screaming in, 4 per target, at this stage, the French ships had failed to detect the missiles, so had the French helicopters, so the French ships couldn;t go to Emergency active radar, and so could only respond at very short range, and with only one system per target. (This is an area we need clearing up..  i.e how many dice per system, and how the whole targeting of missiles by point defence is done.)

Despite half the missiles being destroyed by effective point defence of guns and AMM, the central French frigates were hit 2 and 3 times each, with the heavy SS-N-22 missiles immediately sinking both of them. On the other hand, the French stealth ships were unscratched. Their Electronic Warfare (EW) score (4) is deducted from the missile attack role, and the Soviet missiles missed by miles. Rolling on a D10 with a 7 required to hit, takes it down to a 3..  which is a massive difference (by contrast the Soviet ships EW is a measly 2.)

As the ships got closer, the French shot down a Ka27, and launched a wave of Exocets, crippling one of the Soviet Udaloys, while the SS-N-14 were virtually useless. With the French EW, they were now at 1 to hit on a D10. - no joy and all the Soviet missiles had been fired.  The remaining Exocets crippled a Sovremenny, but the Soviet commander pressed the attack. With no missiles left on either side, he wanted to get into gunnery range..   The French, being outclassed in guns, wisely decided to retire the scene. And so the game drew to a close.

Despite the apparent Soviet missile advantage, the EW scores made a huge difference. A much more even contest than it might at first appear.

Overall, we managed to muddle our way through the game pretty well. Lots of flicking back and forward as is always the case with a new set of rules. But both of us have decided they are well worth another try. We have some questions that Peter will ask in the appropriate forums.


Too many charts, it shows it is first time around
Looking forward to the next run.

Operation Battleaxe - Caunter in 6mm

A quick one, showing the results of caunter, tyres, rusty exhausts and a wash with Coat d'arms Dark Brown Super wash..  pretty happy. Now for the tracks, the infantry figures, and the rest.


Wednesday 11 September 2013

Operation Battleaxe - OOB, BKCII - Part 2

Started adding the second colour - and now debating at what stage I should or shouldn't add a wash..  and what shade.


Tuesday 10 September 2013

Operation Battleaxe - OOB, BKCII

The previous post showed the GHQ figures & models for my Commonwealth Desert Force, the composition is (very loosely) based on Operation Battleaxe in June 1941. I took some (ok, lots of) liberties with scale to get the most varied composition I could on to the painting table, and this is what I came up with totalling 3000 points. (Purists may look away).

I also took the liberty of assuming losses had meant that 4th Armoured Brigade, which in real life was attached to the escarpment force, was reassigned to 7th Armoured Brigade group. (So I could use the Matildas). The total number of tanks assigned was up to around 190, so my scaled down version would be approximately 1:15 - approximately 1 model per squadron. (ToE was 18 tanks per squadrn, but you could assume non-runners would be at least 1 in 6 given the mechanical reliability (or not..) of tanks in the desert. The other compromise was using A9 models (because I like them) for 2RTR, which in reality was a mix. For administrative purposes during a game this would mean checking whether the model firing was A9, A10 or A13. A pain.

The challenge on table may well be coordination of the large support group mainly infantry with the separate armour groups. BKCII seems to favour the mixed battlegroup. Another notable thing for the period is that I can find no details of anti-tank capability.


British Western Desert - Operation Battleaxe, June 1941  
Description No
7th Arm'd Div - Maj Gen Michael O'Moore Creagh - CO (CV8) 1
Divisional Troops  
11th Hussars (Recce) - Vickers VI Light tank 1
11th Hussars (Recce) - Rolls Royce A/C 1
4th & 143 Sdn Royal Engineers (Pioneers) 2
Carriers (Pioneers) 2
Forward Artillery Observer (CV7) 2
Trucks (FAO) 2
7th Support Group - Brig John Campbell - HQ (CV8) 1
1st, 3rd, 4th & 106 Rgt RHA (25Lb - 4 gun battery) 4
Trucks (Art Towing vehicles) 4
1st Batt. Kings Royal Rifle Corps (Veteran) 6
Support Unit Vickers 1
Support Unit 3" Mortar 1
Trucks (1st Batt) 8
2nd Batt Rifle Brigade (Veteran) 6
Support Unit Vickers 1
Support Unit 3" Mortar 1
Trucks (2nd Batt) 8
4th Arm'd Brigade - Brig Alexander Gatehouse - HQ (CV8) 1
4th RTR - detached to Indian 4th Div.
4th RTR Vickers VI Light Tank 3
7th RTR - Lt. Col Basil Groves - Matilda II 3
7th Arm'd Brigade - Brig Hugh Russell - HQ (CV8) 1
2nd RTR (MkI, II, III/IV Cruisers) - count as A13 4
6th RTR (Crusader) 4  

Western Desert 1941 - 6mm for BKCII

My last post was my 1943 German Tunisian force. After the last game I offered to face Dave's Panzers, and elected to paint up some 1941 Western Desert Commonwealth forces. The tanks are a mix of Crusader I, Matilda II, A9 Cruisers, and that behemoth, the Vickers Light Tank VIb.

I shrank the historical composition of a couple of regiments to get the mix, supported by 25llb RA units, universal carriers, armoured cars (including a venerable Rolls Royce) and a few motorised infantry. The pictures show the undercoated (Iraqi Sand) vehicles getting a first few stripes of caunter camouflage, using a very thinned down Citadel Knarloc Green. Next step will be a very thin third colour using Citadel Space Wolves Grey, which to my eyes, should work as the grey (slate) colour that apparently faded down to a blue'ish shade. It seems that theses have been written about these colours, but I have elected to go with works for my eye. So here's the WIP.

Thursday 5 September 2013

Tunisian Scrap

After a while without playing BKCII, Dave and I got together to have a go at a conflict in Tunisia in early 1943. We played the counter-attack scenario, 3000 points of Germans vs 2000 points of Allies.

I based the German battlegroup on Kampfgruppe Irkens - (some background here - http://aleadodyssey.blogspot.com.au/2013/08/tunisia-1943-germans-6mm-bkcii.html ).

We were very rusty and got a few things wrong..   first shock for me was the complete Allied Air Superiority, so Dave rolls d6 +2 vs my d6 -1..  ouch, -2 to my chances of calling in an air strike, and any attack subject to 6 Anti-Air attacks. I didn't get to even try as my Forward Air Controller didn't manage to get into position.

Secondly, we got the rules wrong for reconnaissance units. So be it. The battlefield was pretty random, with plenty of dune/hills to break up line of sight. Dave kept his armour back, and infantry forward, with half-tracks (M3 with 75mm guns) in support.

After the first move, from the German right flank.
Close(r)-up

Quote of the night.. "you could win with a bunch of pygmies armed with fruit-peelers if you had high enough command values".

BKCII uses a mechanism like Warmaster, roll under the command value (CV) to issue an order - roll again at -1 with additional minuses for units depending on distance from the command unit. The German Kampfgruppe had a CO with CV = 10 and HQ = 9. Very good command and control, the Allied side was 8's and 7's.  I haven't done the maths, but with 2 dice, I would guess I was averaging at least twice as many moves as the Allies. A huge advantage. 

Allied infantry is isolated and lacking AT capability
Dave's infantry had no answer to advancing armour, and his artillery that might have helped, just kept failing command rolls.

From the German base edge

It was good to blow the dust off, and we talked a bit after the game, raw Allied troops up against the heaviest armoured assault were always going to struggle.

So after this as a practice, cobwebs gone, we are going to try another one. Next time I will use my British & Commonwealth Western Desert force. Dave gets to pick date and scenario. We shall see if I can do better vs the Panzers...

Wednesday 4 September 2013

Scary Goths


So I decided I would try a different painting technique for the bazillion Goths..  so here's the main lot of mounted, cleaned up and stuck to tongue depressors. About 6 hours worth, as there is a not insignficant amount of flash on these guys.


Next step is to get out the airbrush, and then spray them all in varying shades of chestnut, brown, black etc. by stick. Once that's done, back to dabbing on various linen and earthy shades, brighter cloaks etc. Then try a brush on of wood stain. Will be interesting to see how they turn out, as it is very different from my usual paint technique.

And Vale Donald Featherstone.