Pages

Showing posts with label Rubicon. Show all posts

Sunday, 17 January 2021

More snow covered vehicles

Well, this little project seems to be humming along nicely. Rubicon supplied a Schwimmwagen and a Sdkfz 251 with my Rubi discounts - very inexpensive, I also dug out a couple of earlier purchases that just needed finishing. Passengers were Warlord plastic from another set of purchases.

In addition, Warlord had another of their discount deals and 20% off the Heer Winter Support Pack, that netted me the HMG plus extra figures for jump off points, medic and additional crew for the HMG team. I also picked up their package with flamethrower, sniper and panzerschreck team. So overall I am pretty happy that virtually everything purchased has been at a substantial discount. 

Everything is there for a German Heer force suitable for Volksgrenadier Divisions from late 1944 - 45.  With one exception, a Panzer IV J. I am so tempted by the Rubicon offering. Will I, won't I ? Oh, and since I have three Hetzers, surely one would be improved by adding Bicarb?


Painting underway...

Nice and polished, well. actually just the gloss varnish to prepare for decals and pinwashing.

Enough dithering, Here are the additional vehicles - finally resplendent in their Bicarbonate of Soda 'snow'.


L-R - 75mm gun mix of Warlord plus 1st Corps crew, Schwimmwagen (Rubicon) with Warlord passengers, and Sdkfz 251 Ausf D (Rubicon), Warlord passengers. At the back is a Warlord Resin UNIC Halftrack, used by 21st Panzer Division. I spotted it was pretty much done other than detail painting and weathering so slippe dit in with this batch.

And here's the UNICs friend from a much earlier post, another converted French vehicle using the Lorraine tractor as a base and with a 150mm mounted on top to make the Lorraine Schlepper. 


So the target is to finish off this platoon this week. And then resist the temptation to add winter US... 

Wednesday, 6 January 2021

Here Kitty Kitty...

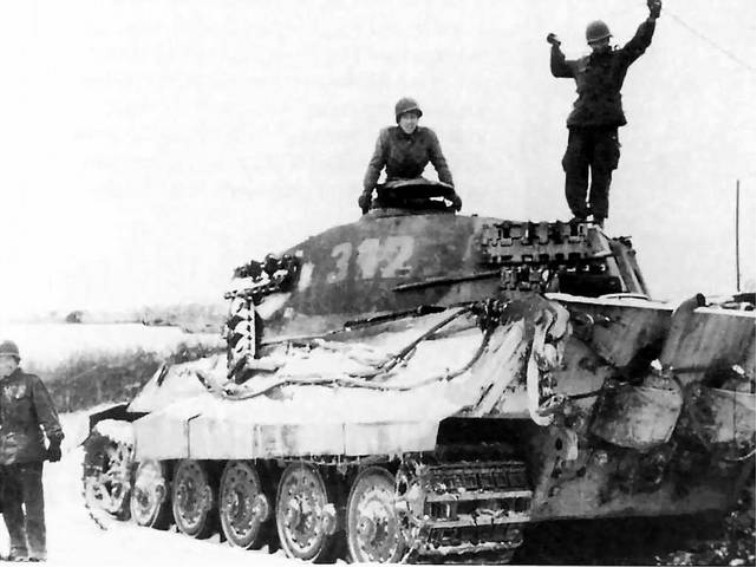
Those researching the 1944 Ardennes Offensive will probably be familiar with this image. The Rubicon King Tiger kit even has the number decals included. 


I elected to not make an exact copy, simply so the rivet counters couldn't tell me exactly why it was wrong to pair it up with Volksgrenadiers.. So my rendition of the Rubicon kit is more of an 'homage'.


It's actually making me feel chilly looking at it! oh wait.. that's because the central heating failed on the 30th and is still off, waiting for parts.  

Tuesday, 29 December 2020

Culverts and Bengal Tigers

I finally got round to finishing off the culvert from Sabotag3d which has been lurking around for ages, and now can be safely stored away in a terrain box till we are all allowed out to play again. 

The early war campaign uses culverts in one game, and I should have purchased two sets, but thought I would check out one before fully committing. They are very nice, and quick and easy to paint. 


Say it with flowers.. It's always springtime when armies clash..   except when it's winter. Of course.


A platoon of Volksgrenadiers plus a FOO (which I don't think is even an option in the support list). In Chain of Command, there is a headquarters of the officer plus 3 rifle grenadiers, a 2 LMG + riflemen squad, and 2 squads of 8 men (inc Junior leaders) equipped with the StG 44 Assault Rifle. 


And how can you do Battle of the Bulge without a Royal Tiger? - The new Rubicon kit was irresistible. This is the base build not yet glued together so I can paint the interior and the track assemblies. 

And after a little bit of work, texturing the armour plate, replacing grab handles with wire, making up a new towing cable and other minor changes. Here it is undercoated and ready for the airbrush. 

Yes, I know I should be painting Flags of War Jacobites, or even Sub-Roman British and Early Saxons, but this won't take long..  :) 


Sunday, 7 June 2020

Getting all Fancy

So as I confessed in a previous post, getting the correct glue for ABS (Plastic Magic) prompted a whole cycle of American steel. I reckon the cast hull Sherman M4A1 will be going to Steve, but that leaves me with the two remaining Shermans, and as I discovered, possibly a third.

Yesterday was digging the garden, creating a new bed for a rhododendron and some azaleas. (The garden centre was a lot quieter than I had feared, thank goodness.)  Having done that, there were enough Brownie Points acquired to drink beer, eat and join in the Virtual Wargames Club organised by Phil Olley. Great stuff.

This morning, I reviewed what was left of the Rubicon order.. and this was what I decided to go with. The Rubicon resin accessories for wading trunks and a bulldozer blade:


So my Marines are going to be getting support from a wading M4A2 dozer...  I have seen classic pictures of wading Shermans in use as early as 1942, none equipped with a dozer blade, but I'm not going to let that stop me.

As with the M4A3E8 I cleaned up the headlight housings a little, and the grab handle of the gamers version of the .50 cal, drilled (some of) the lifting rings, but otherwise the kit was straightforward and went together beautifully.

Assembling the wading 'funnels' was simple and the parts fitted together pretty well. One thing I found was that the resin is quite soft, and it's tricky to get the pouring gates cut away cleanly. You might just be able to see it on one of the pictures.

In progress


After I looked at this picture I realised I hadn't drilled out the turret front lifting ring..fixed now. You may also be able to see traces of having to sand back the rear 'funnel' at the top. I am sure it will vanish under paint.

The dozer kit goes together very well, and unlike most resin I have worked with, was very clean of flash and showed minimal warping. The build sequence is important, and I made sure that the hydraulic assembly was attached to the transmission casing before attaching the blade. It was one of those operations where an extra pair of hands would be useful.. but it worked.


The pair together. The dozer will now get an undercoat, ready for the airbrush. 


I also picked up some second hand Warlord 'animal casualties', which would appear to be compulsory for games set in France. They needed a bit of filling with Vallejo Plastic Putty, but are now ready for undercoat. I am debating with myself whether to put these on bases. It would protect them from handling, but might look a bit odd.

Oh, and the M4A2 comes with a spare turret, and a spare hull. The M4A3E8 has a spare track set. So if I scratched the hull box I could build an entire extra Sherman...  So that's another project.

Guess what - that other project materialised. Quick knock up of a lower chassis plasticard box.. and Sherman no 3.


Thursday, 4 June 2020

So a funny thing happened...

There was I, minding my own business, reading blogs and stuff, when I came across a post about glue. Exciting stuff, I hear you say. No, really..  anyway, I have glued together a couple of Rubicon kits in the past, and the kits are lovely, but for some reason I had real difficulty with them.

It turns out that unlike every other plastic kit I have built, which has been made from styrene plastics, Rubicon uses an ABS plastic, and the styrene glues like Tamiya and Revell, just don't stick them together properly. Eureka.. this explains everything.

Ok, I had better get myself some ABS glue for my next Rubicon kit, and then Rubicon has some special deals for lockdown, and there's three Shermans, wading gear, a dozer blade and tank crew, all for £65. Well, it would be rude not to try out my new ABS glue.


Absolutely lovely model. I ran into one problem, which was that the main gun mounting was tricky to seat accurately on the turret. I also made two minor modifications, drilling out the lifting rings and cutting down the brushguards on  the lights. I think it makes a big difference. The 50 cal is Rubicon's 'wargames' version with the barrel overscale for durability. They include both a model and a wargames version in the kit.


And now of course, I will have to get myself some US Marines to play with at least one of the Shermans. I can feel an order to 1st Corps coming on.

And thus the madness continues...

Monday, 12 August 2019

28mm Buildings and US Armour

So, I haven't managed to get much wargames stuff done, real life has been so very intrusive. I have managed to slap some more colours on the Early War German platoon and supports, but they are still a long way from being picture-ready. Some progress has been made on the buildings.

Workshop
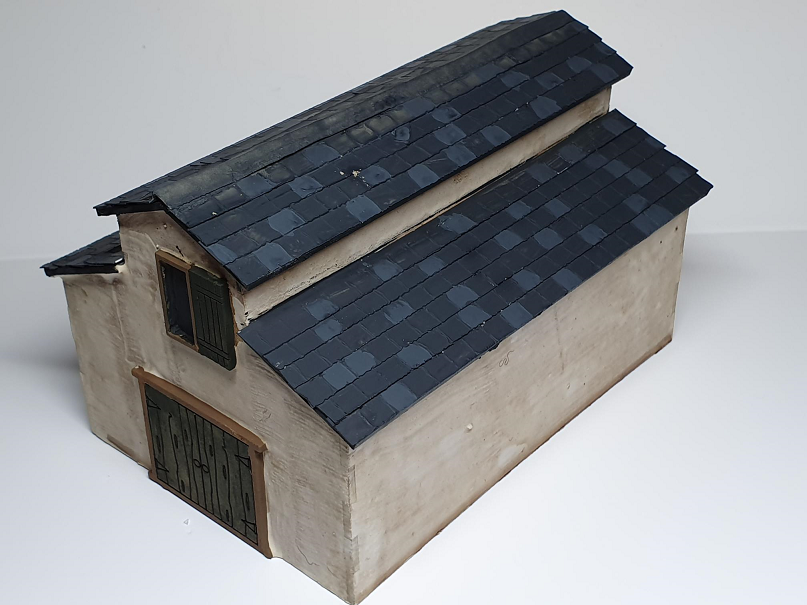
I am fairly happy with the building design, and unlike my first thoughts, I have tiled the roofs, but I now need to add weathering, signage, and a range of little details like a light etc. I haven't quite worked out what kind of workshop it might be, but I wonder if it could be a bicycle workshop? 

Cafe Normandie
Ok, I have to confess; I am a little disappointed with how this is turning out. Essentially I got this wrong. There's a trap for young players, in that the Cafe Normandie signage should go on the first floor (second for our USA chums), and each of the flooring pieces has uniquely keyed tabs for the walls. So check that your signage piece, and the unique rear section for the first floor (2nd for our US cousins etc...) fit on the same floor section. Dry fit, dry fit, dry fit.. 

I ended up with the Signage on the second floor, as I assembled it quickly without checking, and it seems like I blew the whole thing. I simply couldn't get a neat join at the corner intersections, and even after a grouting coat, the interlocking sections are still painfully obvious.

Having seen the sample assembled model on the website, and a sample 'in the flesh' at Claymore, I can't believe the issue was the model, but much more likely that I just boobed in the construction phase. I wish I had another one of these to try and get it right, but ah well. In hindsight, as well as that, I wish I had elected to have the windows either fully closed with shutters, or entirely open. The half closed ones just look odd.

Anyway - on to something I am happier with - the Rubicon Stuart/Scott model.

As Scott

As Stuart
I have left the top hull section unglued so I can swap them out. In an ideal world, I would have cut away the top of the glacis plate and attached it to the different hull tops as the glacis is different, with the Scott having hatches there, the Stuart on the top hull plate. Again in hindsight, this would have been relatively easy, and I could have used magnets to hold the alternative turret + hull-top + glacis in place. At the time though I was again. rushing it.

As with all the Rubicon models I have made, this was an absolute delight to put together, with no flash and really well engineered. About the only thing I did to improve the model was drill out the lifting eyes. The decal sheet looks excellent, but the one criticism I have of the kit is that the marking options are not included anywhere, and so you are left to do your own research - which isn't ideal when you are looking at specific registrations.

I'm still hunting for specific combinations, if anyone can help out, let me know in the comments below.