As I mentioned in my previous post I picked up an ICM kit of the iconic SdKfz 222 armoured car from eBay. So this post is the stages in getting it painted and table ready. I also had a Kettenkraftrad lurking about for my NWE German forces, so I knocked that over too.
 |
| Unboxed |
The kit itself has been the subject of negative reviews, but it went together fine for me.
 |
| Etch and Decals |
The only real complaint is that the decals are so out of register that the multi-colour ones (plates and Balkankreuz) are almost unusable. I did use the plates in the end, after covering them with a ton of dust.
 |
| Assembled |
Assembly was straightforward, other than that the second storage box on the left hand side is a very snug fit if you follow the instructions and put it in after the forward storage box. The hull top and bottom lacks positive locators to ensure a neat fit, so it takes some care. Some green stuff is likely to be needed. The hull pieces are also detached from a separate sprue before packing, a bit ham-fistedly, so you may need to do a little filling there as well.
Care is required with the etch. I recommend bending it in the opposite direction initially, and then reversing it. You will get a neater finish. Also make sure the engine deck grill is absolutely flat, otherwise it's a swine to get in place.
 |
| Assembly omplete |
You will notice the Green Stuff, I used the GW liquid Green Stuff, as it is convenient and easy to use. I also added some additional stowage, such as a pick, helmet, jerry-cans, and MG34 etc.
 |
| Undercoated |
Undercoated my usual car primer, in this case a mid grey, as these vehicles were grey orginally before repainting or even having mud applied. I had an idea about using the hairspray technique for weathering, but not a drop of hairspray in the house, and impatience!
 |
| First Airbrush |
Airbrushing was with Vallejo Model Air, 'Light Brown' from their Buildings set,, heavily mixed with white, then successive layers of highlighting adding more white to the mix. The commander was hacked together using the Warlord Games German Panzer Grenadier torso, head and right arm, while the left arm was from a spare Perry 8th Army radio operator figure. (In the background is the Kettenkraftrad, some objective markers and a range of passengers from Perry and Warlord (Plastic). The light brown makes a good base for DAK uniforms and also the later war ponchos.
 |
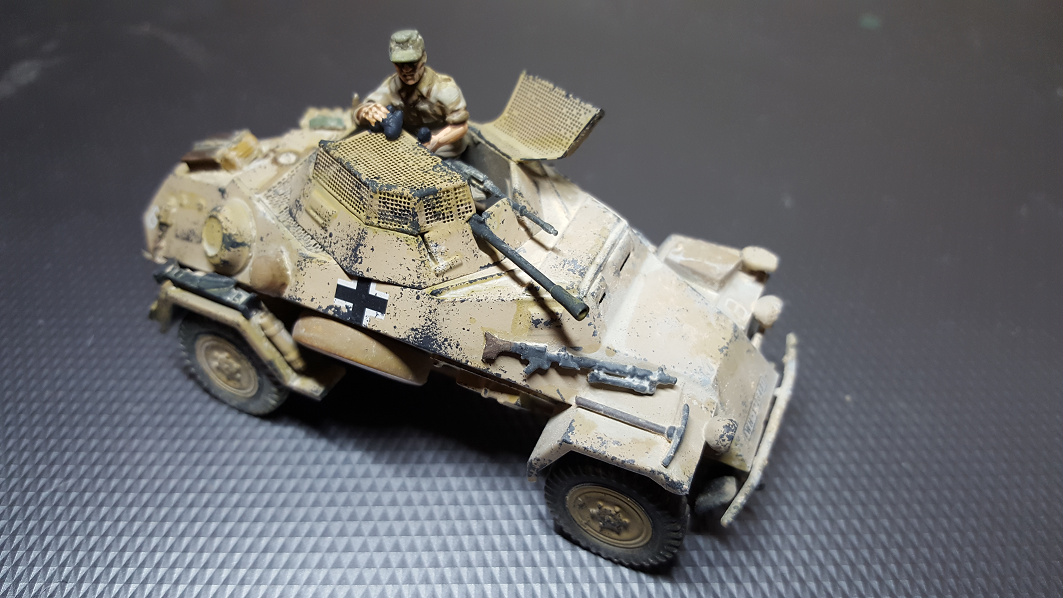
| Done |
Decals were applied, sourced from the spares box and the Rubicon DAK set, chipping was done with packing sponge, spray varnish, and once set the whole thing got a wash with the Vallejo 'Desert Wash' - I don't think I mixed this well enough, and it came out somewhat yellow. I then applied a heavy coat of the Vallejo Desert Sand pigment, and tried to fix this with white spirit... which stripped a decent chunk of the previous work.. ah well.. Some practice needed with pigments obviously.
 |
| Glamour shot 2 |
And while I had the paints out, I threw some paint at a Kettenkraftrad I had already built, but had been lurking for a while.
Hopefully, next post will be some finished infantry!


No comments:
Post a Comment